In this tutorial, we will explain the clothing ease requirements that are designed inside My Sloper for the blouse and dress slopers.
In a typical form for a Blouse or Dress, you may see the following ease entries, valid for My Sloper Version 1.7 and under.
Blouse Ease
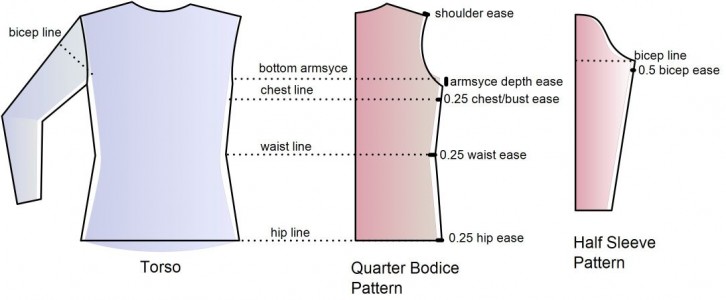
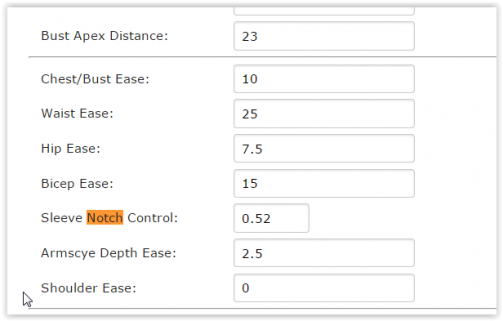
There are six ease entries: Chest/Bust Ease, Waist Ease, Hip Ease, Bicep Ease, Armscye Depth Ease and Shoulder Ease. Here is an example of a bodice and sleeve slopers without ease.
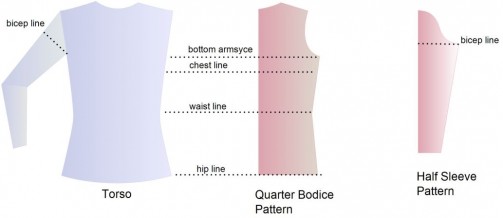
No-ease Sloper
When ease is added to each of the above six ease entries, the bodice and sleeve slopers with ease may look like in the following diagram.
By default, My Sloper comes with preset ease values that are meant for a Sample Profile. When you enter in your own profile data, you will need to adjust various ease values to fit you.
Shoulder Ease
The Shoulder Ease extends the shoulder line forward. Most of the time it is not necessary to add shoulder ease unless you want to design a loose fitting shirt with an overhang shoulder.
Armscye Depth Ease
The Armscye Depth Ease lowers the bottom armscye line to allow movement of the arms. A default 2.5-cm ease is usually sufficient for a blouse or dress.
Chest/Bust Ease
The Chest/Bust Ease widens the garment for comfort and modesty. It has a minimum preset that cannot be changed to ensure that the garment is modest. The default 10-cm ease is usually sufficient but can be increased to your preference.
Hip Ease
The Hip Ease widens the garment at the hip line for comfort and modesty. The default Hip ease of 7.5-cm is usually sufficient but can be increased to your preference.
Bicep Ease
The Bicep Ease widens the sleeve at the bicep line for comfort and modesty. The Bicep Ease minimum of 8-cm is usually sufficient but can be increased to your preference. Remember to tweak your Sleeve cap when the Bicep Ease is changed.
Waist Ease
For Version 1.7-
The default Waist Ease value is based on the Sample Profile provided in My Sloper. Most likely, the Waist Ease will have to be increased based on your chest/bust girth measurement.
If you want to create a straight side seam from the chest line to the waist line, the formula to use is this:
Waist Ease = Chest Girth + Chest Ease – Waist Girth
For Version 1.8+
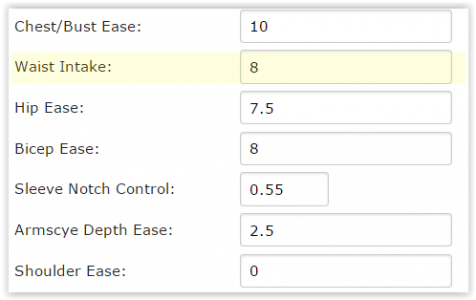
Waist Intake instead of Waist Ease
The Waist Ease is no longer valid in Version 1.8+ and is replaced by the Waist Intake. The Waist Intake, as the name suggests, lets you to tell My Sloper how much to take in from the chest girth. If you want a straight side seam, you would take in 0.
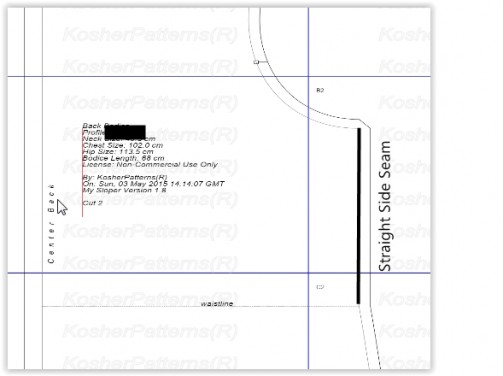
Straight Side Seam
Version 1.7-
If you want a slanted side seam between the chest and waist lines, you will want to reduce the above waist ease further.
New Waist Ease = Waist Ease – some number
Version 1.8+
If you want a more shapely side seam, you would provide a positive Waist Intake. Don’t worry, we have provided a default of 8-cm intake which works most of the time.
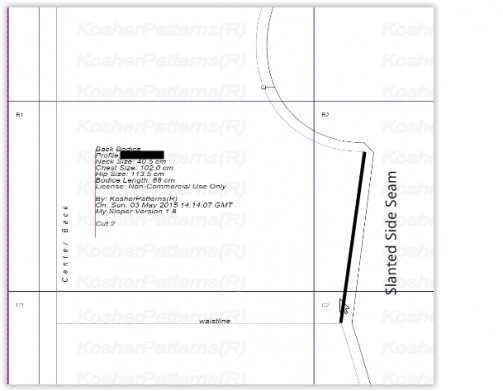
Slanted Side Seam
Contact us if you would like assistance in creating a sloper with a good fit.
